
How to Upload Your Healthcare Brand Assets to Canva: Uploading Illustrator (AI) files and vector images (svg/eps) files to Canva
Whether it’s a brand identity, a logo, a website, or marketing materials, we love helping our clients’ companies express themselves. With that in mind, one of our top priorities with all of our designs is that our clients not only to be able to update all designs on their own, but feel confident doing so.
Maintaining a consistent, professional brand image is crucial for healthcare organizations. Whether you’re a clinic, hospital, or health tech company, your brand assets—from your logo to specific color schemes—need to be accessible and ready to use in all your marketing efforts. Tools like Canva make it easier for healthcare professionals to create branded materials efficiently without needing design experience.
Here’s a simple guide on how to upload your healthcare brand assets to Canva, ensuring your brand remains strong and cohesive across all platforms. We’ll break down how to edit an .ai (Adobe Illustrator) or SVG (vector illustration) file in Canva. Canva is a great design tool because it allows non-designers to design! It gives anyone the opportunity and the potential to create digitally. However, as with all design tools, there’s still a learning curve. Let’s dive into how to upload a design file to Canva so you can change colors and move assets around on your own.
Step 1: Gather Your Healthcare Brand Assets
First, you'll need to gather all your key brand elements. These could include:
Logos (in various formats such as PNG, AI, or SVG)
Color Codes (specific HEX or RGB codes for your brand colors)
Fonts (ensure you have access to any specific fonts that are part of your brand guidelines)
Images (including photos of your facilities, team members, or stock images that align with your brand)
These assets are especially important in healthcare because consistency in how you present your brand builds trust with patients and partners. Whether it's a patient brochure, an email campaign, or a social media post, all touchpoints should reflect the same professional identity.
Step 2: Export from Adobe and Upload to Canva
Once you’ve gathered your assets, log into your Canva account and follow these steps:
Open Your Canva Account
If you don't already have an account, creating one is simple. Just visit Canva and sign up for free or pay for a team account to collaborate.Navigate to the Brand Kit
In the Canva dashboard, you’ll see a tab labeled “Brand Kit” on the left-hand side. Click it, and you'll be taken to a page where you can upload your logos, set your brand colors, and input your brand fonts.Upload Logos and Fonts
Click “Upload” under the “Logos” section to upload your healthcare brand logos in various formats such as PNG or SVG. Repeat the process under the “Fonts” section if you have specific fonts tied to your healthcare brand guidelines.Set Brand Colors
Healthcare organizations often have a defined set of brand colors that are linked to the overall identity. To ensure these are easily accessible when creating marketing materials, input your HEX or RGB codes under the “Brand Colors” section. This will allow you to apply your healthcare brand colors seamlessly to any design.Uploading AI Files
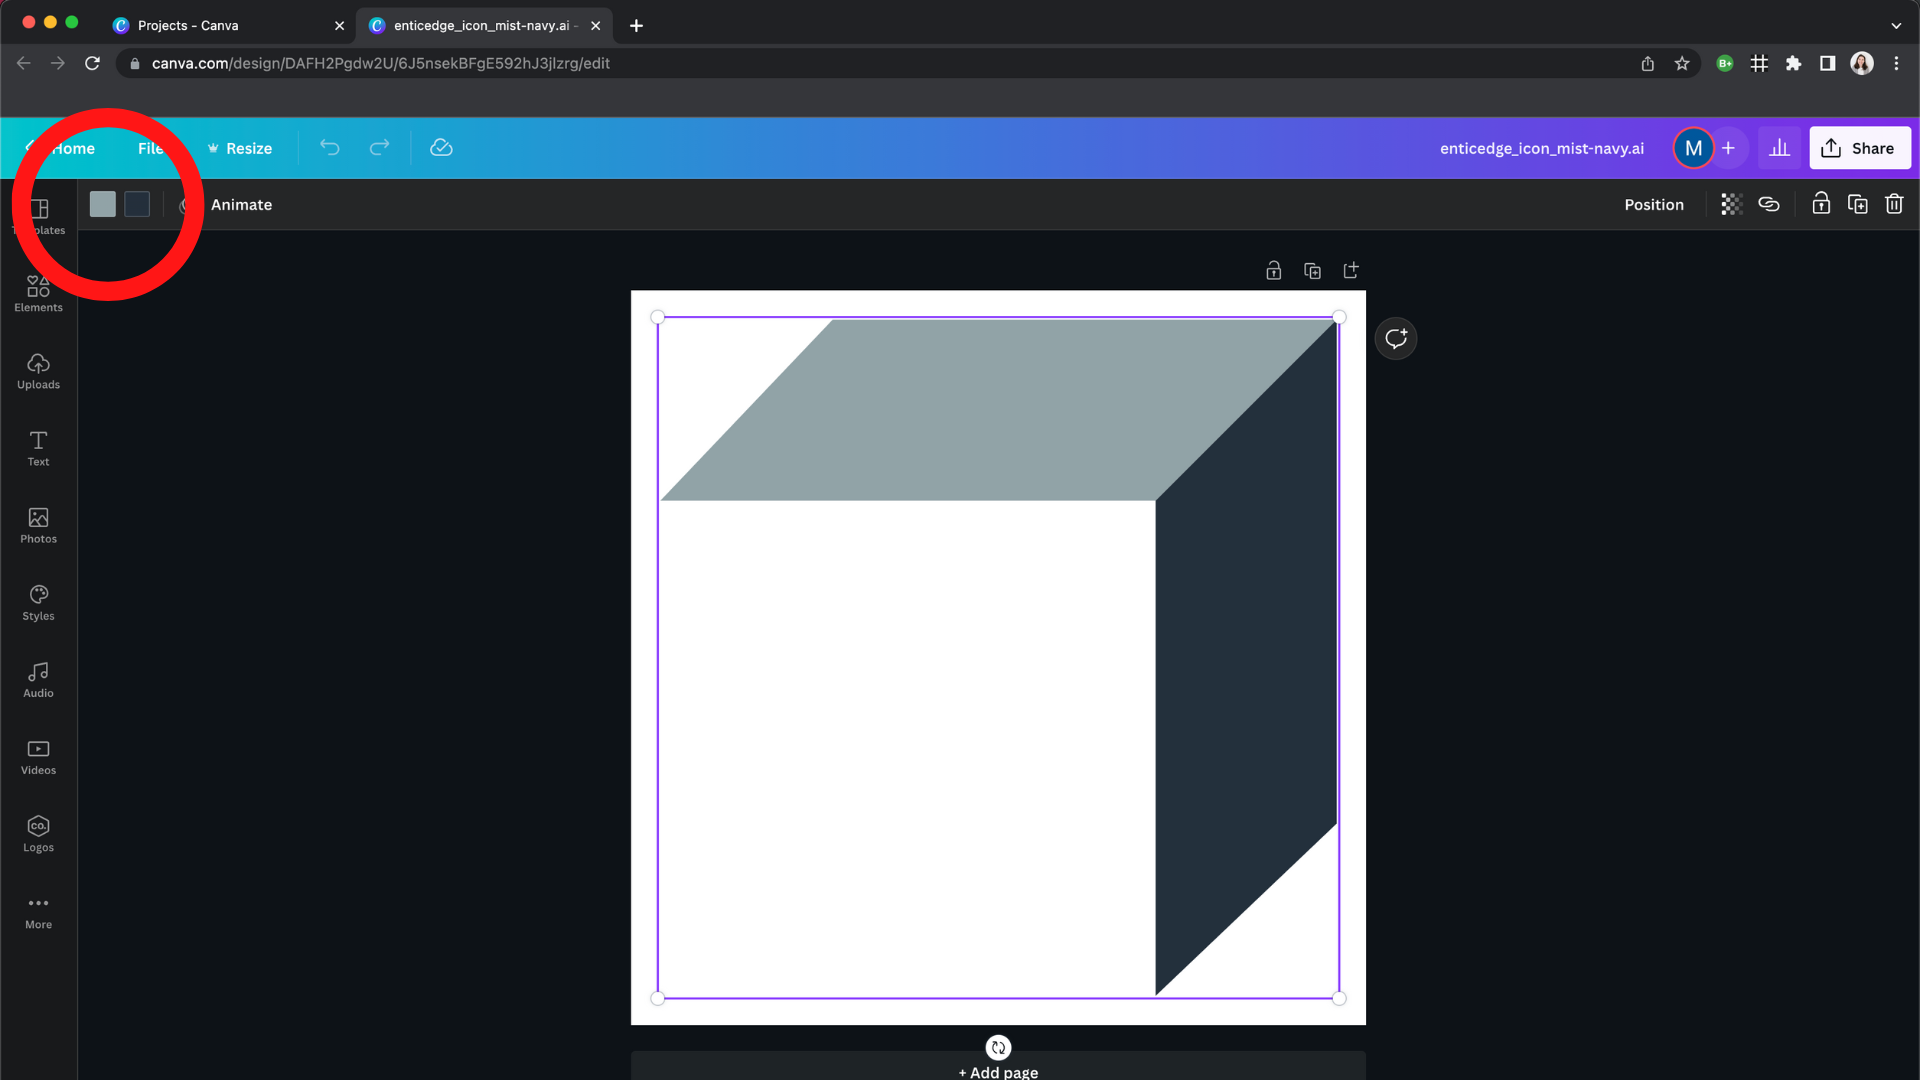
AI files (Adobe Illustrator) are commonly used by designers for logos and complex graphics. If you have AI files for your healthcare brand, Canva makes it easy to upload them:Step 1: Navigate to the "Uploads" section on the left-hand menu.
Step 2: Drag and drop your AI file into the upload box, or click “Upload Files” and select the AI file from your computer.
Step 3: Canva will convert your AI file into a usable format. You may lose some editing flexibility, but your logos and designs will be available for use across your designs.
Keep in mind that not all AI file layers and elements will be fully editable in Canva, so ensure that your AI files are flattened or simplified before uploading, especially if you plan on making adjustments within Canva. Keep reading for tips on exporting from Adobe!
How to Export AI Files for Canva
To ensure that your Adobe Illustrator files are editable in Canva, it’s important to export them properly. Here’s how you can do that:
Simplify and Group Elements: Group related elements in your design, such as text boxes or icons, to maintain the layout in Canva. Grouping makes it easier to edit the file once uploaded.
Export as SVG: Canva works well with SVG files for maintaining editability. To do this in Illustrator, go to: File > Export > Export As, then select SVG as the file type.
Single or Multiple Asset Export: If you want your elements to remain separate for individual editing, you can export them as multiple assets.
If you prefer to upload a complete logo or graphic that doesn’t require further editing in Canva, export as a single asset by ensuring everything is grouped before export.
Flatten Layers for Complex Designs:
If your design contains complex layers, flatten them to prevent unexpected changes in Canva. To do this, select all layers and flatten them before exporting.

Step 3: Creating Consistent Healthcare Designs
With your brand assets uploaded, it’s time to create! Canva will automatically have your healthcare brand kit available whenever you're working on a project, making it easy to stay on-brand across everything from patient education materials to social media graphics.
Brochures and Flyers: Build informative content for patients or partners, using your logo, colors, and fonts.
Social Media Graphics: Maintain a consistent look across platforms like LinkedIn, Facebook, or Instagram, ensuring all communication reinforces your healthcare organization’s professional image.
Email Templates: Design clean, cohesive email newsletters that keep patients and healthcare partners informed while building brand recognition.
Step 4: Share With Your Team
One of the best features of Canva is that it allows easy collaboration. Once your healthcare brand assets are uploaded, you can share them with your marketing or communications team. This is especially useful for large organizations where multiple departments need access to branded materials.
Final Thoughts
For healthcare organizations, consistency and professionalism in your marketing materials are key to building patient trust and strengthening your brand’s presence in the market. By utilizing Canva to upload and store your healthcare brand assets, you streamline the creation process while ensuring every touchpoint aligns with your brand.
At EnticEdge, we specialize in helping healthcare organizations elevate their brand and improve patient engagement through strategic advising and user-friendly digital experiences. Whether you're looking to refine your branding or create seamless marketing communications, we're here to support your growth. Let’s talk about how we can drive your healthcare organization forward.
If you liked this blog, you might also like…


